
PPF Installation Uses Water: How Installers Protect Electronics
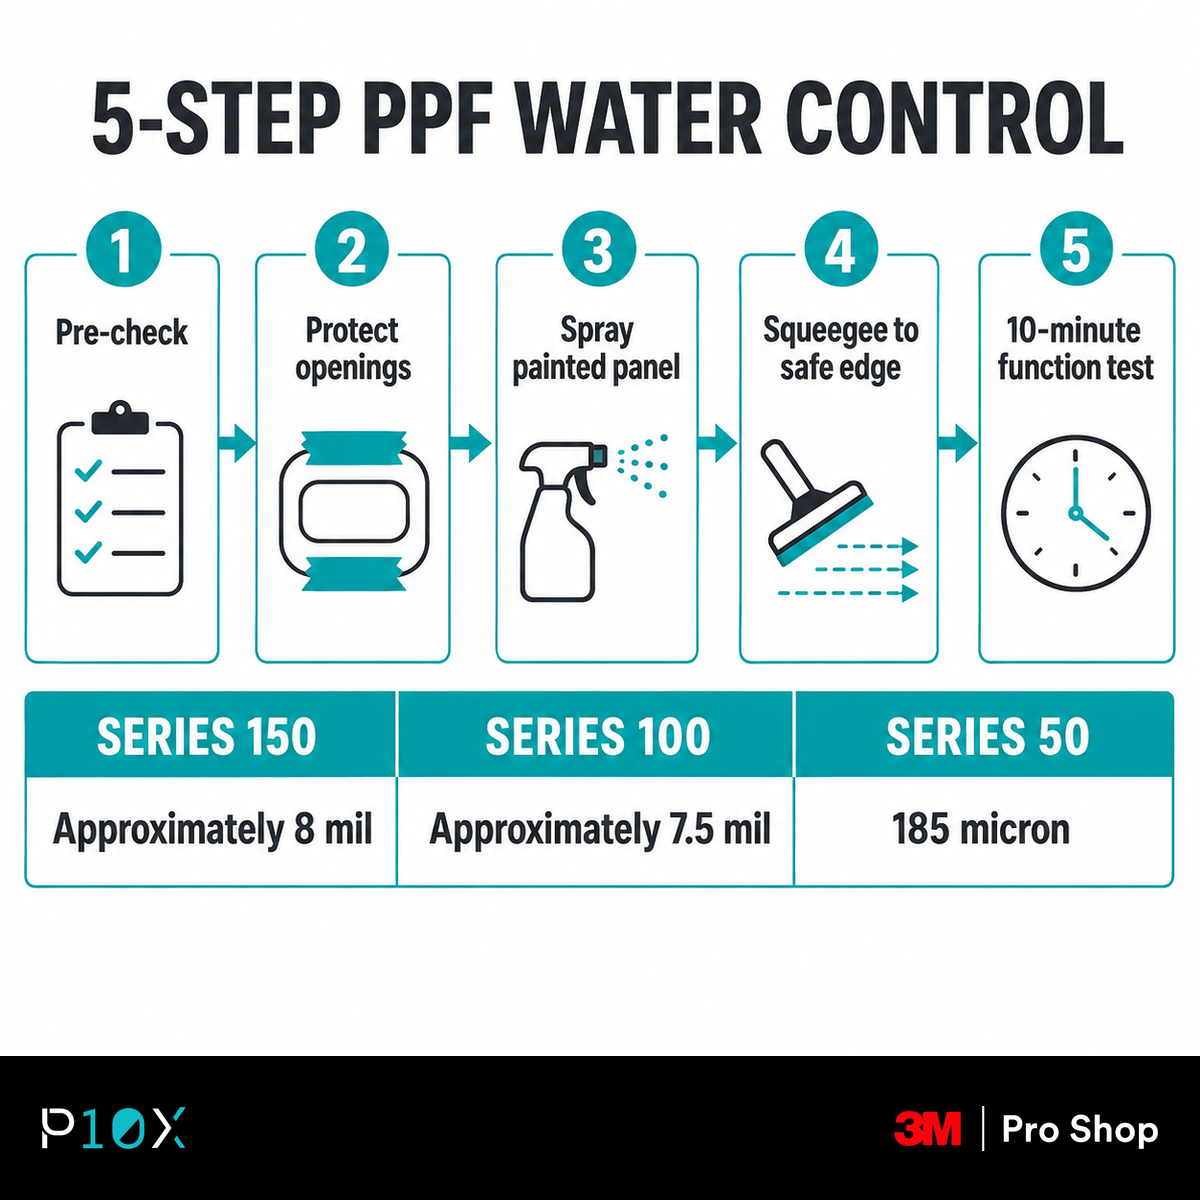
- Ask how the workshop controls spray around lamps, cameras, trim gaps and open connectors.
- Photograph switches, sensors and warning lights before the work starts.
- Check every function again before accepting the car.
- Judge the process by control and documentation, not by whether water appears at all.
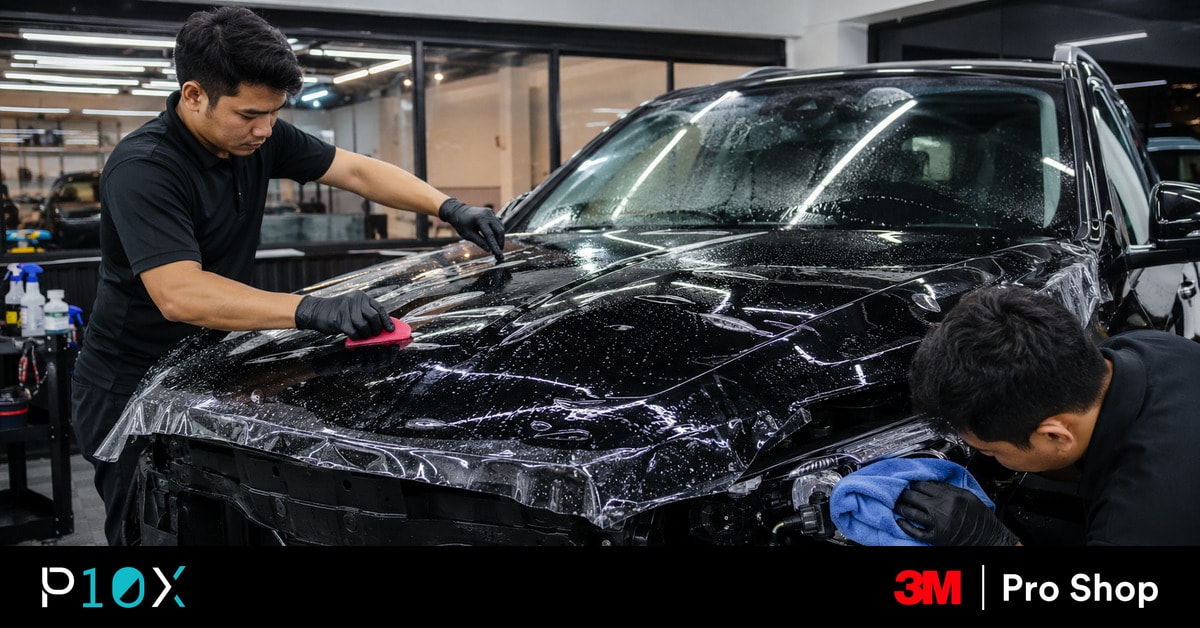
PPF installation water electronics concerns usually begin the moment you see a technician spray solution across a bonnet. The wet surface looks risky, especially on a modern car with cameras, radar units, powered handles and headlamps packed into narrow body gaps.
Wet installation itself is normal. 3M explains that trained installation matters to the quality and appearance of PPF, while professional wet-application guides use water-based slip solution so film can be positioned before the adhesive takes hold. The issue is uncontrolled liquid, not the existence of liquid. A useful starting point is the 3M PPF Malaysia comparison because it separates film choice from workmanship.
You are probably reading this after watching your own car disappear under a cloud of spray, or before leaving it at a workshop for two or three days. What you need is a way to recognise a controlled process and a clear handover test when the car comes back.
Wet PPF Installation Needs Control
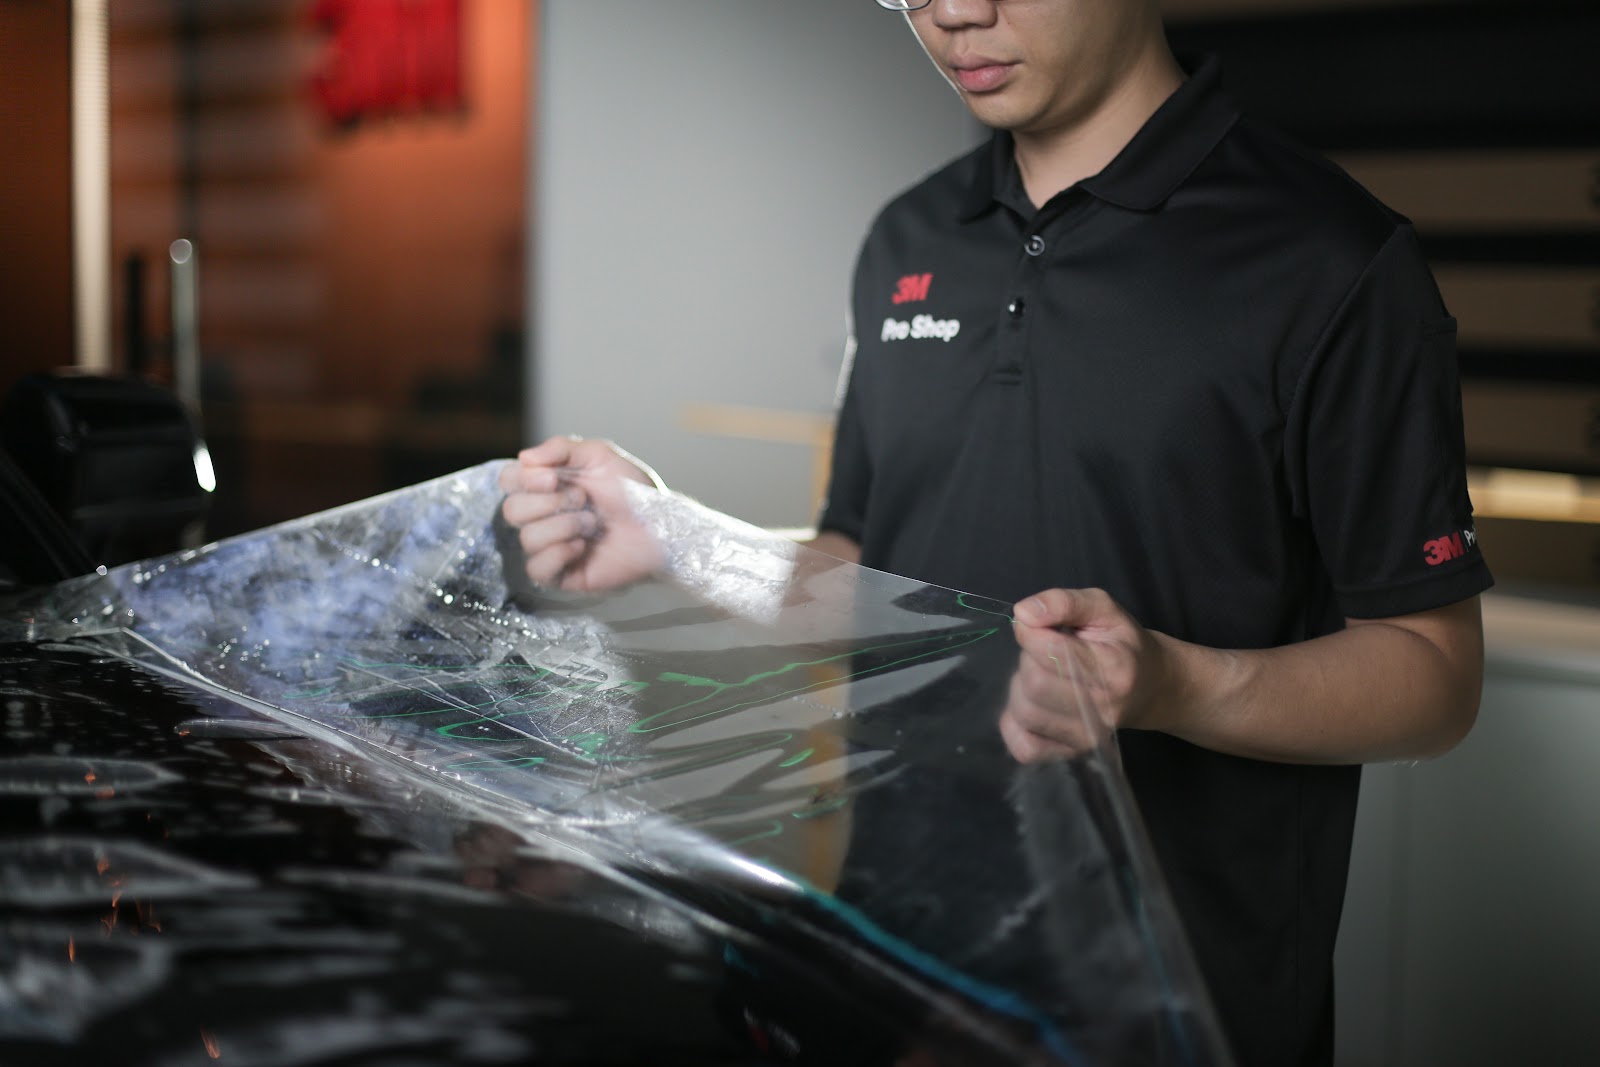
Slip solution temporarily reduces the adhesive's initial grip. That lets an installer align a large sheet across a curved bonnet, lift it, correct tension and push liquid towards a safe edge. Without enough slip, the film may grab too early and create stretch marks or poor alignment. With too much uncontrolled spray, liquid can run into places where it is not needed.
A trained installer divides the car into working zones. On a bonnet, spray belongs on the prepared paint and adhesive face. It does not need to be blasted into a headlamp seam, open charging flap or exposed camera housing. The car PPF installation Malaysia guide shows why technique matters, while the 3M certified installer guide explains what training should look like. You can also use the pre-install inspection guide to document the car before any panel is wet.
Think of the job as liquid routing. The technician decides where solution starts, which direction the squeegee moves and where runoff is collected. At 34°C in a Klang Valley workshop, a large bonnet can dry faster than a cool roof panel, so spray volume and working time change by panel. Good control stays deliberate even when the pace changes.
Water Risk Starts at Openings
Painted steel and clear-coated plastic panels are the intended work surfaces. Risk rises at openings. A removed lamp, unplugged sensor, open boot switch or partially dismantled trim piece creates a path that normal exterior rain does not follow. The workshop should identify those paths before spraying begins.
Modern cars also have drainage routes. Water at a door or boot opening is not automatically evidence of a problem because manufacturers design channels to move rain away. The question is whether the installer knows the difference between a drain route and an exposed connector. At 15 minutes into a bumper installation, a dry towel placed behind a known gap can show whether runoff is being caught as planned.
Ask for a walkaround before disassembly. Confirm which lamps, handles, cameras or trim pieces may be loosened. Photograph the dashboard with the ignition on, then record the camera view, parking sensor display, powered tailgate and lights. This creates a clean before-and-after record without turning the conversation into an argument later.
Installer Barriers Make the Difference
Physical protection is simple but important. Absorbent towels can sit below an active edge. Low-tack protective material can cover a connector area. Spray bottles should deliver a controlled fan rather than a hard stream. A second technician can manage runoff while the first holds a large sheet under tension.
Removal decisions matter too. Taking off every component is not automatically safer. Unnecessary disassembly can introduce broken clips, disturbed seals or a connector that is not fully reseated. A careful installer removes only what improves access and finishing, then protects what stays in place. The right choice changes between a simple bonnet and a bumper carrying several sensors.
Watch how tools are staged. A bottle lying beside an open switch area is a warning sign. A tidy tray, labelled bottles and dry towels already in position show that the technician planned the next 10 minutes instead of reacting after liquid has travelled. This is one reason a controlled workshop environment matters more than a dramatic installation video.
Panel Risk Changes the Method
Not every panel needs the same amount of solution or the same protection. A flat bonnet provides a broad working area. A bumper has grilles, parking sensors and deep curves. A mirror cap is small but sits beside wiring and a powered folding mechanism. The table below turns those differences into a practical installation plan.
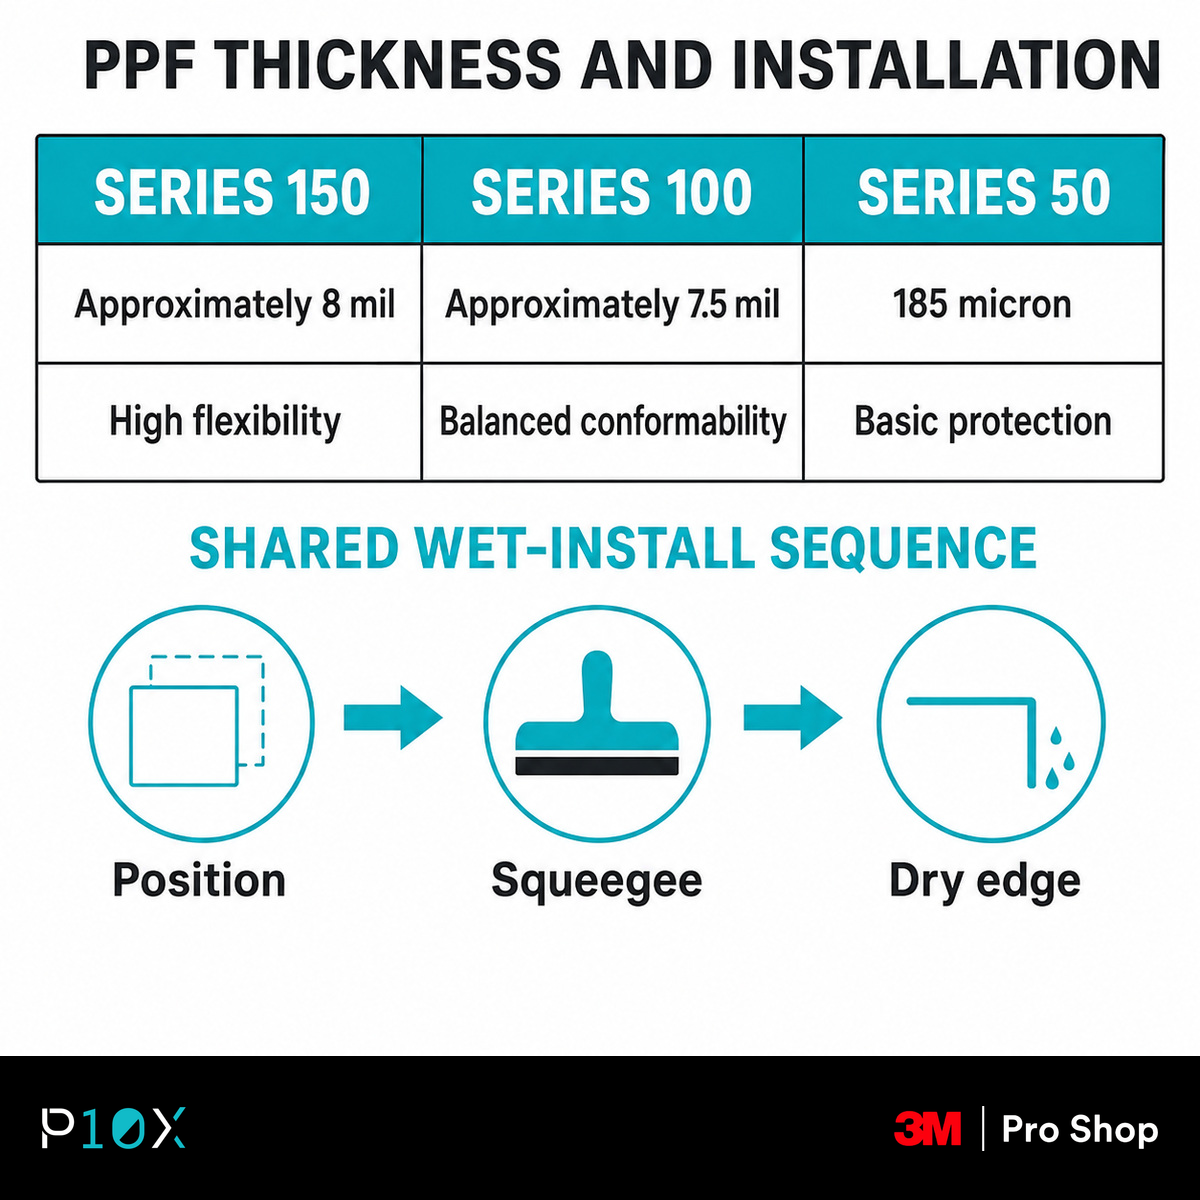
Coverage should follow exposure and complexity. A car doing 80 km each weekday on PLUS or KESAS gives the bumper and bonnet more impact exposure than the roof. Series 150 Gloss suits owners prioritising clarity, flexibility and a hydrophobic finish. Series 100 Gloss offers a balanced option, while Series 50 Gloss covers basic protection needs.
The series choice does not replace workmanship. An approximately 8 mil film still needs controlled alignment, safe edge work and proper removal of solution. A clean per-panel plan also helps you ask better questions before the car enters the bay.
| Panel | Impact risk | Liquid-control issue | 3M series | Coverage tier |
|---|---|---|---|---|
| Front bumper | High | Sensors, grilles and lamp gaps | Series 150 Gloss | Full front |
| Bonnet | High | Large sheet and rear edge runoff | Series 150 Gloss | Full front |
| Front fenders | Medium | Lamp and door-edge paths | Series 100 Gloss | Full front |
| Mirror caps | Medium | Powered folding mechanism | Series 100 Gloss | Wear zone |
| Door cups | Low | Handle and switch openings | Series 50 Gloss | Wear zone |
Handover Tests Take 10 Minutes
Start with the dashboard before walking around the car. Turn the ignition on and look for new warning messages. Check the front and rear cameras, parking sensors, headlamps, indicators, powered boot, powered mirrors and door handles. A 10-minute function test is faster than discovering a problem in the evening jam.
Then inspect the film. Some moisture may remain while the adhesive settles, but switches and trim gaps should not feel wet. Look under the bumper edge, around lamp seams and beside camera housings. Use a dry tissue at suspicious gaps. If the tissue picks up fresh liquid repeatedly after the car has been sitting, ask the workshop to inspect the route before you leave.
Finish with a short drive inside the area. At 20 km/h, test cameras and parking alerts in a quiet carpark. At the next stop, check that no lamp fogging, new warning or powered feature failure has appeared. Record anything unusual with a 20-second video that shows the time and function.

What the 3-Litre Estimate Means
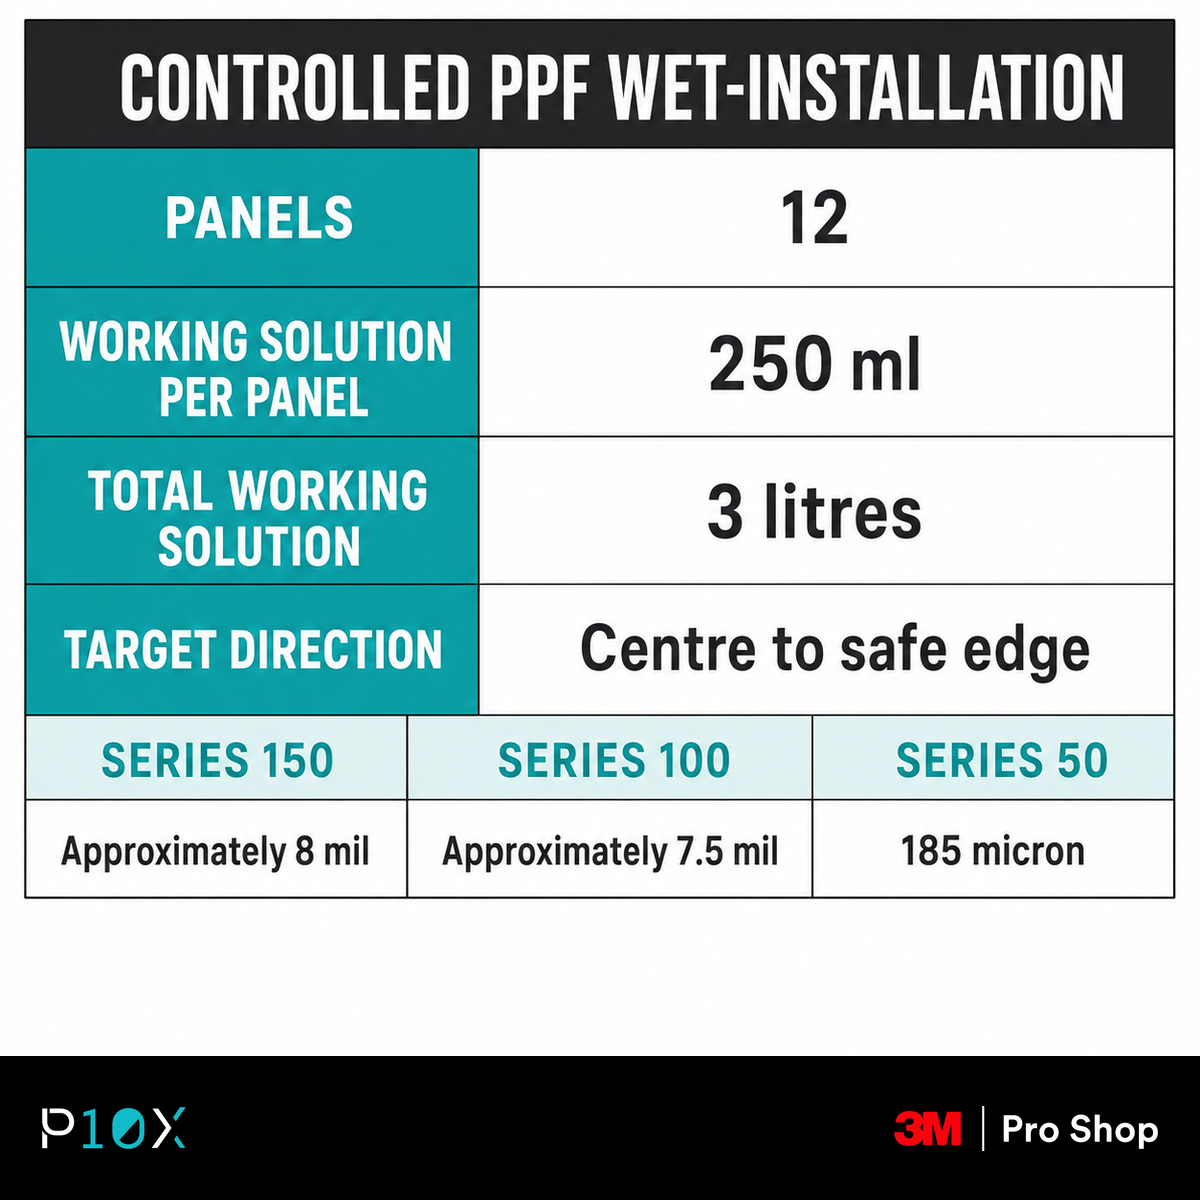
Consider a full-car example with 12 working panels. If the average working volume is 250 ml per panel, the job handles 3 litres in total. That is not a target recipe for every car. It is a scale check that explains why towels, extraction and direction matter even when each individual spray looks small.
The same 3 litres can create two very different outcomes. Spread across prepared surfaces and pushed to safe edges, it supports clean positioning. Sprayed into every gap without a collection plan, it creates avoidable exposure. The calculation therefore measures process discipline, not danger by itself.
Panel shape changes the average. A bumper may need more slip and more frequent removal of displaced solution. A door cup needs far less. Ask the workshop to explain its control points rather than demand a fixed volume. A good answer names the vulnerable openings and how each one is protected.
Red Flags Need Immediate Attention
Stop the handover if a powered feature no longer works, a warning remains on the dashboard or water is visibly pooled inside a lamp or cabin trim. Do not accept a vague instruction to wait if the symptom involves an electrical function. The workshop should inspect the relevant area while the car is still present.
Cosmetic moisture under fresh film is a different category. It can look cloudy before the remaining solution leaves. The key distinction is location. Moisture trapped between film and painted panel affects appearance. Liquid inside a connector, switch or lamp housing affects a component and needs a direct check.
Also look for rushed cleanup. Wet carpets, soaked boot trim, loose clips or a connector cover left open show that containment failed. Take photographs before anyone wipes the evidence away, then ask for the affected area to be opened and dried correctly.
Ask the Installer to Explain Water Management
A careful consultation should cover the liquid route before the film roll is opened. Ask where the installer expects solution to travel on the bonnet, doors, mirrors, roof edge and boot lid. The useful answer is specific to the car. It should identify seams, apertures, sensors and trim pieces that change how the panel will be prepared.
Ask which components will be isolated and which will be removed. Removal is not automatically better. Taking off a badge, handle or trim piece can improve access, but it also introduces disassembly work. The installer should be able to explain why removal produces a cleaner result on that panel and how every connector or clip will be checked before handover.
Look for a staged workflow. High-risk edges should be prepared separately from broad open areas. Absorbent cords, towels and protective film should be replaced when saturated rather than carried from panel to panel. A tidy bay also matters because pooled solution on the floor, trolley or cable can migrate back onto hands and tools.
Finally, ask how the team records pre-existing electrical behaviour. Cameras, powered handles, mirror folding, soft-close doors and window switches should be demonstrated before installation. This baseline gives the technician a clear list to retest when the car is finished and separates an existing fault from a new observation.
Recheck the Car After the First Drive
The delivery-bay test confirms immediate operation, but a second check after normal use can reveal a loose trim clip or moisture held in a hidden edge. Park in a dry, well-lit place after the first drive. Walk around the car before washing it so new drips cannot be confused with installation solution.
Operate each item once using the same order as the handover. Lock and unlock the car, fold the mirrors, open each door, cycle the windows and confirm cameras and sensors. One clean comparison is more useful than repeatedly pressing a control that has started to behave abnormally.
Inspect the lower edge of mirrors, handles and lamps for continued dripping. A small amount of clean solution soon after installation may be harmless. Coloured residue, a damp connector area, a warning message or a switch that feels wet needs prompt workshop review. Photograph the location before wiping it so the technician can trace the route.
Keep this follow-up separate from normal film settling. Slight surface haze or a small moisture pattern under newly installed PPF concerns the adhesive layer. An electrical warning, dead control or repeated malfunction concerns the vehicle system. Clear notes about which symptom appeared help the installer choose the right inspection.
Choose Process Before Film
PPF installation water is manageable when the workshop inspects first, protects openings, controls spray and repeats every function at handover. Ask a 3M Authorized Dealer such as 3M Pro Shop by P10X to explain those controls before booking, then keep your own photo record and 10-minute checklist ready.
PPF Water Questions
Is water normal during PPF installation?
Yes. Wet installation uses a water-based slip solution so the film can be positioned and squeegeed. The workshop should control where it travels.
Can PPF solution damage electronics?
Liquid can cause problems if it reaches an exposed connector, switch or module. Controlled spray, barriers and immediate drying reduce that exposure.
Should lamps be removed for PPF?
Only when removal improves access and can be completed safely. Unnecessary disassembly can create its own trim, seal or connector problems.
What should I test after PPF installation?
Test cameras, parking sensors, lights, mirrors, handles, the boot and dashboard warnings before leaving the workshop.
How much solution does a full-car job use?
There is no universal volume. A 12-panel example at 250 ml per panel equals 3 litres, but panel shape and technique change the real amount.
When should I stop the handover?
Stop if a powered feature fails, a warning remains active or liquid is pooled inside a component area. Ask for a direct inspection before driving away.
Find out the best protection for your car
Visit a 3M Pro Shop and discover the cost-effective 3M Protective Film and Window Tint
Author

Kelvin Cheen
Kelvin is an Automotive Solutions Consultant and Branch Manager at 3M Pro Shop. With 4+ years of field experience in premium vehicle surface protection, Kelvin specializes in flagship 3M technologies, including 3M Crystalline Black optical film and Ceramic IR tints, 3M Paint Protection Film (PPF), etc. His focus is on delivering transparent, engineering-backed advice to car and EV owners, cutting through sales upsells to ensure customers choose the exact thermal rejection and paint protection tailored to their driving needs.
Experience the future of window tinting
Visit a 3M Pro Shop and discover the revolutionary Crystalline CR BLK film