
Step-by-Step Guide to Professional 3M Car Tint Installation in Malaysia
Understanding car window tint installation processes helps you set realistic expectations and evaluate installer quality. While you should not attempt professional-grade installation yourself, knowing what happens during the process allows you to recognise proper technique, ask informed questions and appreciate why certified installation costs more than roadside alternatives. For insights on why 3M's science-backed technology requires professional handling, read our guide on car window tinting Malaysia benefits. This article walks through each stage of professional 3M window film installation as performed by trained technicians.
Before You Arrive: Pre-Installation Preparation
Professional installation begins before your car reaches the shop.
Vehicle Preparation by the Owner
Most installers provide specific instructions:
Recommended before your appointment:
- Wash your car or have it washed within 24 hours of the appointment
- Remove personal belongings from window sills, dashboards and door pockets
- Clear any items that might obstruct access to windows
- Inform the installer of any existing glass damage or concerns
What to avoid:
- Applying wax or sealant products to glass within a week of installation
- Using rain repellent products on windows
- Attempting to clean windows with household glass cleaners on installation day
Installer Preparation
Professional shops prepare before your arrival:
- Film inventory confirmed and matched to your vehicle specifications
- Clean room environment activated and verified
- Tools and supplies laid out and inspected
- Installation bay temperature and humidity controlled
Stage 1: Vehicle Inspection and Documentation
Every professional installation starts with thorough assessment.
Exterior Glass Inspection
The installer examines each window for:
Pre-existing damage:
- Chips or cracks that could worsen during installation
- Scratches that will be visible under film
- Delamination on factory tinted glass
- Damaged window seals or trim
Contamination assessment:
- Residue from previous tint removal
- Adhesive remnants
- Water spots or mineral deposits
- Industrial fallout or paint overspray
Interior Inspection
Before work begins, installers check:
- Dashboard and trim condition near windows
- Door panel condition and fastener status
- Electronic components near window edges
- Any factory privacy glass specifications
Documentation
Professional shops create records including:
- Photos of pre-existing conditions
- Vehicle identification and mileage
- Film specifications selected for each window
- Customer acknowledgment of any noted issues
This documentation protects both parties and supports warranty claims if needed later.
Stage 2: Surface Preparation
Proper preparation determines installation success more than any other factor.
Initial Cleaning
The first cleaning pass removes visible contamination:
Exterior glass cleaning:
- Full exterior wash if not recently done
- Glass-specific cleaner application
- Removal of debris from window edges and channels
- Inspection for remaining contamination
Interior glass cleaning:
- Removal of fingerprints and smudges
- Cleaning of edges where film will bond
- Verification of glass condition from inside
Deep Decontamination
Beyond visible dirt, professional preparation addresses invisible contamination:
Clay bar treatment:
- Removes embedded particles not visible to the eye
- Creates a perfectly smooth surface for adhesion
- Essential for long-term film performance
Chemical decontamination:
- Specialised solutions dissolve industrial fallout
- Removes residue from previous tint if applicable
- Prepares surface at molecular level for adhesive bonding
Final Preparation
The last preparation steps create optimal conditions:
Lint-free wiping:
- Removes any remaining particles
- Uses specialised cloths that leave no fibres
- Multiple passes from different angles
Alcohol wipe:
- Final degrease of bonding surfaces
- Removes any remaining residue
- Allows rapid evaporation leaving clean surface
Stage 3: Door Panel and Trim Removal
Quality installation often requires accessing areas hidden by interior panels.
Why Panels Are Removed
Removing door panels allows:
Better edge coverage:
- Film extends deeper into window channel
- No visible film line at top of window
- More durable edge seal
Interior protection:
- Prevents water damage to electronics
- Protects switches and speakers from moisture
- Allows thorough drying before reassembly
Quality finishing:
- Cleaner appearance with no compromises
- Proper tension on film edges
- Professional result that lasts
Door Panel Removal Varies by Car Model
Not every vehicle requires the same level of panel removal. The requirement depends on window mechanism design, trim attachment, and how deep the film needs to extend into the window channel:
- No removal needed: Some vehicles like Tesla models use frameless window designs or accessible channels that allow full edge coverage without panel removal.
- Partial removal: Many modern vehicles like certain Proton Saga variants may require partial loosening of the panel or specific trim pieces rather than full removal.
- Full removal required: Older vehicles with manual rolling windows typically need complete panel removal to access the window channel properly.
Your installer should assess your specific car model and explain what level of removal is needed before starting work. If you are concerned about panel removal, ask during your pre-installation consultation. A knowledgeable installer will know your vehicle's requirements from experience.
The Removal Process
Trained installers follow manufacturer procedures:
- Identify and remove visible fasteners
- Release hidden clips without damage
- Disconnect electrical connectors properly
- Set aside panels safely for reinstallation
- Protect exposed interior surfaces
Not All Shops Do This
Budget installers often skip panel removal:
- Results in visible film edges at window top
- Risks water intrusion into door electronics
- Limits edge sealing quality
- May void vehicle warranty if damage occurs
When evaluating installers, ask whether they remove door panels. The answer reveals their quality commitment.
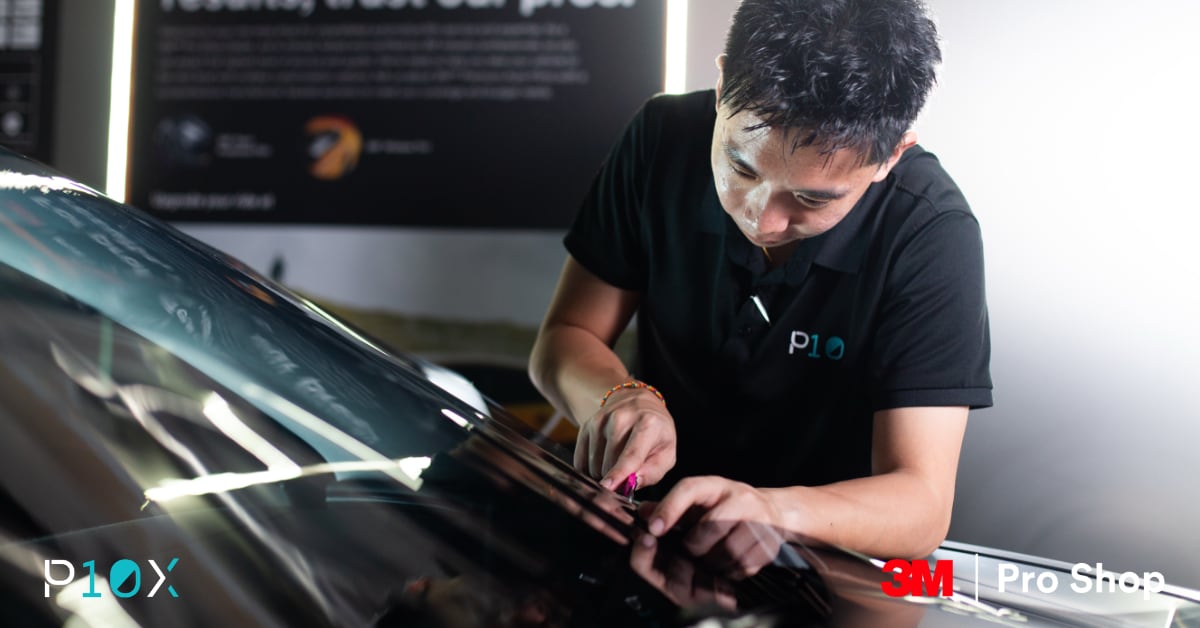
Stage 4: Film Cutting and Preparation
Precision cutting determines fit quality.
Pre-Cut vs Custom Cutting
Pre-cut patterns:
- Computer-designed templates for specific vehicles
- Consistent results for common models
- Faster installation time
- Reduced film waste
Custom cutting:
- Required for rare or modified vehicles
- Allows adjustment for factory variations
- More skill-intensive but flexible
- Used when pre-cut patterns are unavailable
Professional shops typically use pre-cut patterns where available and custom cut when necessary. The precision of these techniques, combined with genuine 3M film quality, explains the performance differences seen in our 3M Crystalline tint comparison with other brands.
The Cutting Process
For custom cutting:
- Film positioned on exterior glass surface
- Precise marking of cut lines
- Careful cutting following glass contours
- Allowance for edge wrap where applicable
- Final trimming after positioning
Film Handling
Proper handling prevents contamination and damage:
- Film kept covered until ready for application
- Minimal touching of adhesive surface
- Clean gloves used throughout
- Immediate application after preparation
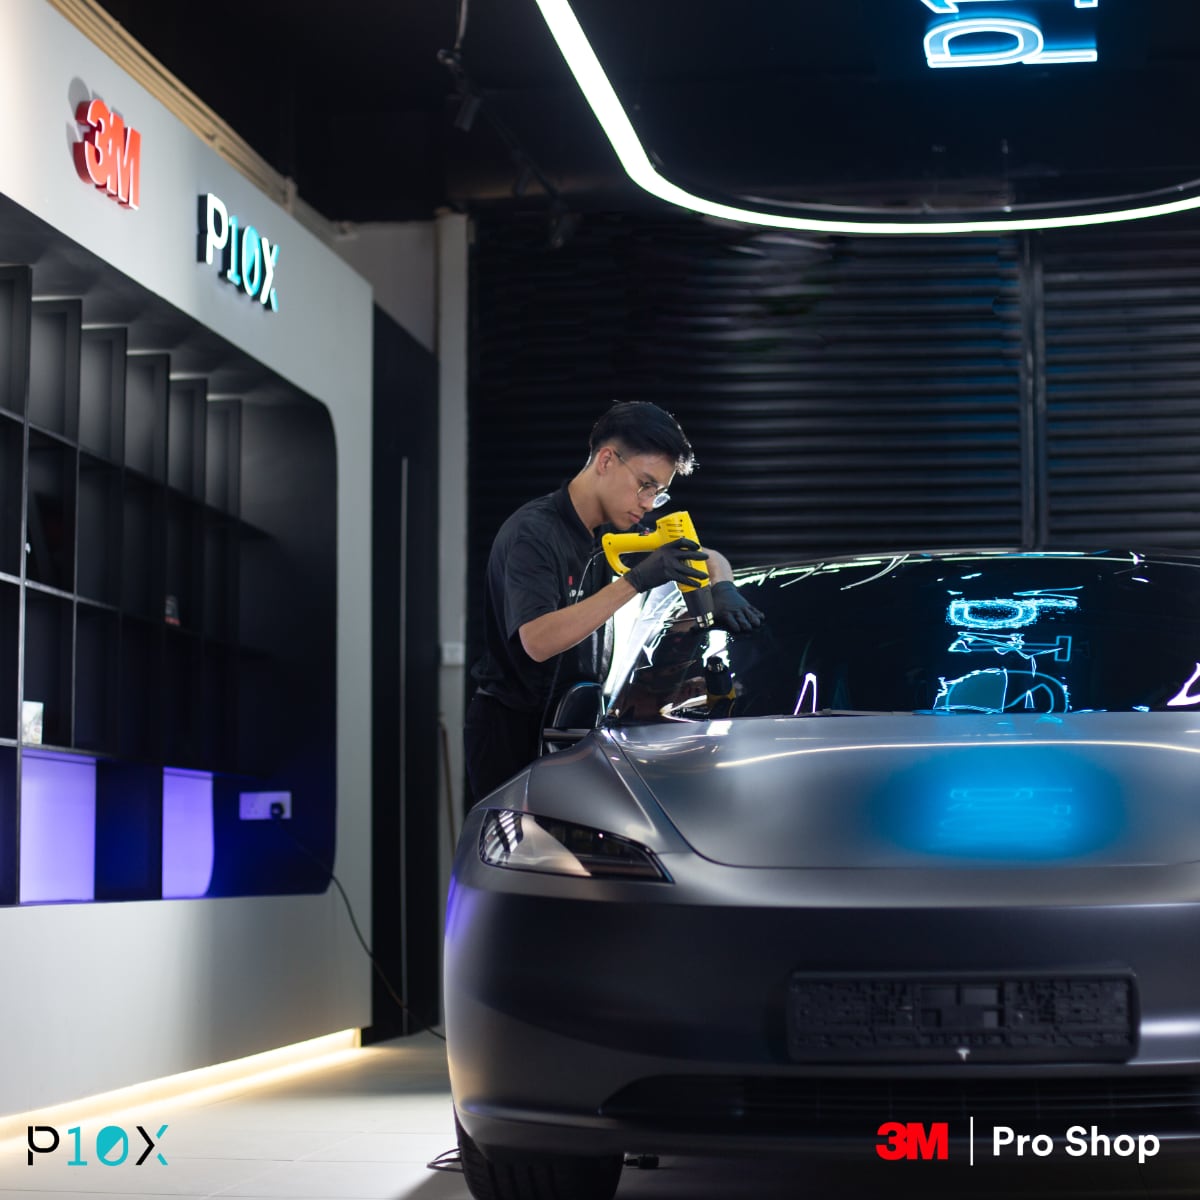
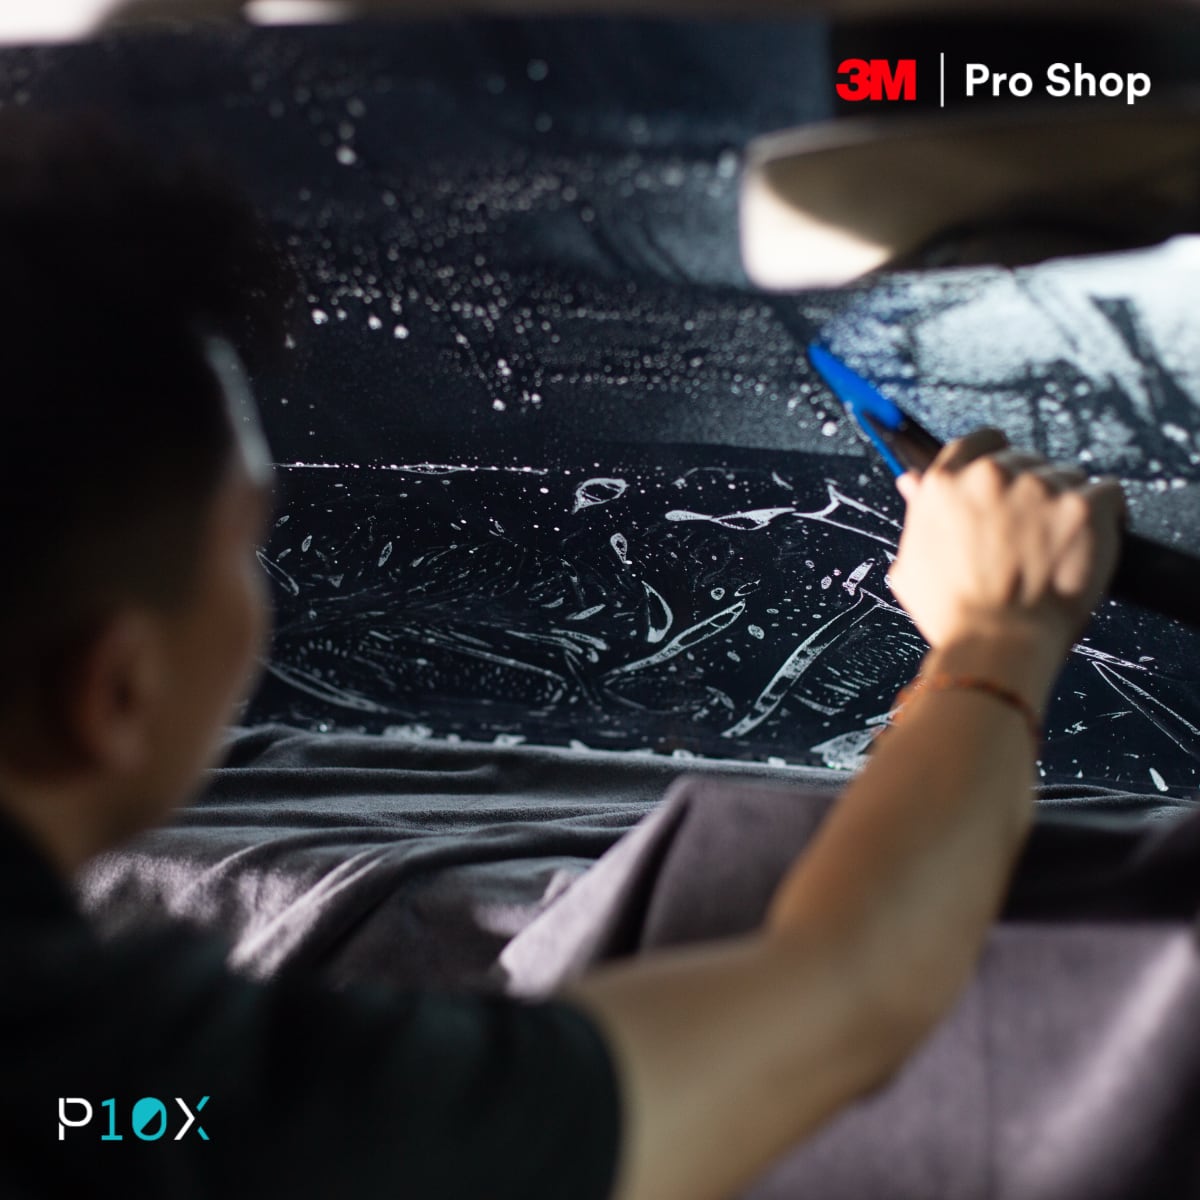
Stage 5: Film Application
The application stage is where skill and environment combine.
Slip Solution Application
A solution allows film positioning before adhesive activates:
Purpose:
- Creates thin layer between film and glass
- Allows repositioning without adhesive grabbing
- Permits removal of bubbles during application
- Evaporates leaving film bonded to glass
Application:
- Sprayed liberally on glass surface
- Additional application on film adhesive side
- Consistent coverage prevents dry spots
Initial Positioning
Placing the film requires precision:
- Film aligned with glass edges
- Initial positioning checked from multiple angles
- Adjustments made while slip solution active
- Proper coverage of all intended areas verified
Squeegee Work
Removing solution and securing adhesion:
Technique:
- Firm, consistent pressure
- Overlapping strokes from centre outward
- Multiple passes at different angles
- Edge sealing with appropriate pressure
Purpose:
- Removes slip solution from under film
- Eliminates air bubbles
- Activates adhesive bonding
- Creates smooth, uniform appearance
Heat Application
Heat serves multiple purposes during installation:
For conforming to curves:
- Film softens when heated
- Allows stretching around compound curves
- Prevents stress wrinkles and lifting
For edge sealing:
- Activates adhesive at edges
- Improves long-term durability
- Prevents moisture intrusion
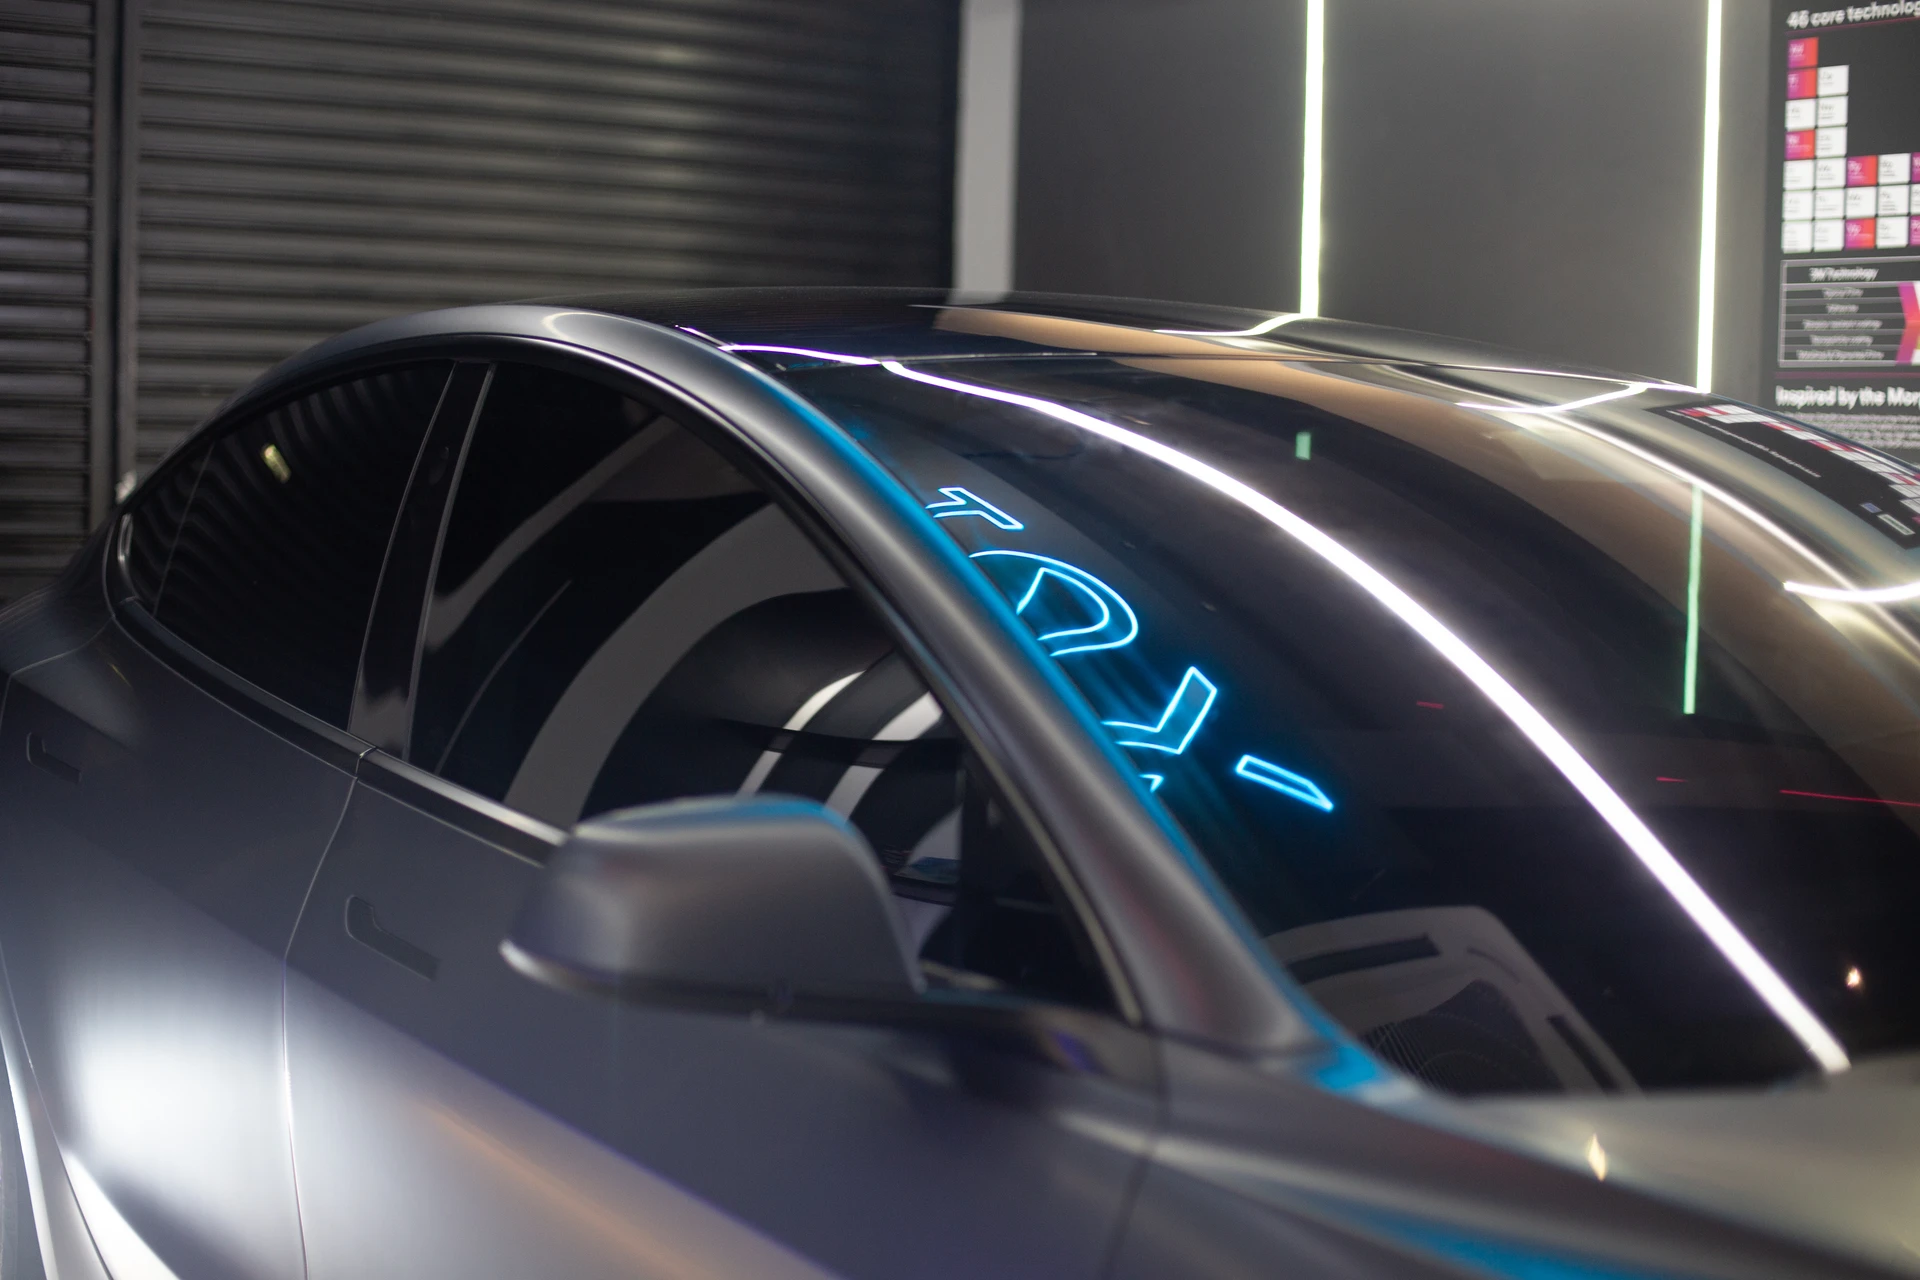
Stage 6: Edge Finishing and Detailing
Final detailing separates professional from amateur work.
Edge Wrapping
Where film meets glass edges:
Proper technique:
- Film tucked into window channel
- Invisible transition at window top
- Consistent gap at movable edges
- Heat-sealed edge adhesion
Common shortcuts to avoid:
- Film stopping short of edge (visible line)
- Excessive gap allowing moisture entry
- Uneven edge lines
- Edges not properly sealed
Gap Management
Small gaps are necessary at certain points:
Why gaps exist:
- Allow window operation without film damage
- Prevent stress when windows move
- Account for manufacturing tolerances
Proper gap specifications:
- Typically 1 to 2mm at moving edges
- Consistent around entire perimeter
- Not visible during normal use
Final Inspection
Before reassembly, installers verify:
- No visible contamination under film
- No bubbles or wrinkles
- Consistent edge alignment
- Proper adhesion at all points
- No damage to surrounding trim
Stage 7: Reassembly and Final Checks
Professional installation includes proper reassembly.
Door Panel Reinstallation
Reversing the removal process:
- Reconnect all electrical connectors
- Position panel correctly on door
- Secure all clips and fasteners
- Test all switches and controls
- Verify proper panel fit and alignment
System Testing
Before releasing the vehicle:
Window operation:
- Each window tested up and down
- No binding or unusual sounds
- Film not catching on seals
Electronics verification:
- All switches functional
- Speakers working if disconnected
- No warning lights triggered
Visual inspection:
- All panels properly seated
- No visible damage from work
- Clean interior condition
VLT Measurement
Professional shops measure final results to ensure JPJ compliant window tint specifications:
- Each window measured for VLT compliance
- Readings documented for customer
- Any concerns addressed before departure
Stage 8: Customer Handover
The installation is not complete until proper handover.
Documentation Provided
You should receive:
- Invoice with film specifications per window
- Warranty registration or e-warranty confirmation
- VLT measurement records
- Care instructions
Aftercare Instructions
Critical information for protecting your investment:
The 72-hour rule:
- No washing for 72 hours minimum
- Avoid operating windows if possible
- No touching or rubbing the film surface
- Allow adhesive to fully cure
Initial weeks:
- Small water bubbles are normal and will disappear
- Hazy appearance may occur initially
- Do not attempt to smooth out bubbles manually
- Contact installer if concerns persist after 2 weeks
For comprehensive details on 3M's flagship window film technology and the science behind 200-layer nano-technology, refer to our 3M Crystalline CR BLK Malaysia launch announcement.
Common Installation Timeframes
Realistic expectations help you plan your day.
Typical Installation Duration
Factors Affecting Duration
Longer installations result from:
- Previous tint removal required
- Complex vehicle design
- Additional preparation needs
- Premium film requiring more careful handling
Shorter installations may indicate:
- Experienced installer efficiency
- Pre-cut patterns available
- Simple vehicle design
- Proper preparation completed in advance
Planning Your Day
Most shops recommend:
- Drop off in the morning for full car installation
- Allow full day availability even if quoted shorter time
- Arrange alternative transport rather than waiting
- Confirm completion before arranging pickup
Evaluating Installation Quality
Knowing what to look for helps you assess the work.
Immediate Inspection Points
Before leaving the shop, check:
Visual quality:
- No visible bubbles (tiny water bubbles acceptable initially)
- No debris or dust particles under film
- Consistent colour and clarity across all windows
- Clean, straight edges
Functional checks:
- All windows operate smoothly
- All door controls functional
- No unusual sounds when operating windows
Issues to Address Immediately
Report before leaving if you notice:
- Large bubbles that appear to contain air
- Visible contamination under film
- Significant colour variation between windows
- Edges not properly sealed
Normal Post-Installation Appearance
Expect and do not worry about:
- Small water bubbles that will dissipate within 2 weeks
- Slight haziness during curing period
- Minor cloudiness near edges initially
Why Certified Installation Matters
The process described requires training, equipment and environment that justify professional installation.
Training and Skill
Certified installers:
- Complete manufacturer training programmes
- Practice on training vehicles before customer cars
- Learn proper techniques for each film type
- Understand how to handle problems
Equipment Investment
Professional installation requires significant investment that impacts 3M window tint price:
- Clean room with filtered air
- Temperature and humidity control
- Proper lighting for defect detection
- Precision cutting tools
- Quality squeegees and application tools
Warranty Implications
Installation quality affects warranty validity:
- 3M warranty requires authorized installer
- Documentation must be provided properly
- Installation defects are installer responsibility
- Product defects are manufacturer responsibility
For professional 3M window tint installation with proper certification and documentation, visit our 3M Pro Shop locations in Kuala Lumpur and Selangor. Our certified installers provide the expertise and environment described throughout this guide, ensuring your window tint installation meets the highest standards.
Find out the best protection for your car
Visit a 3M Pro Shop and discover the cost-effective 3M Protective Film and Window Tint
Interested in Becoming a Professional Window Tint Installer?
After reading about the detailed process and precision required for professional window tint installation, you might be considering this as a career path or business opportunity. The automotive aesthetics industry in Malaysia continues to grow, creating demand for skilled installers who can deliver the quality standards described throughout this guide.
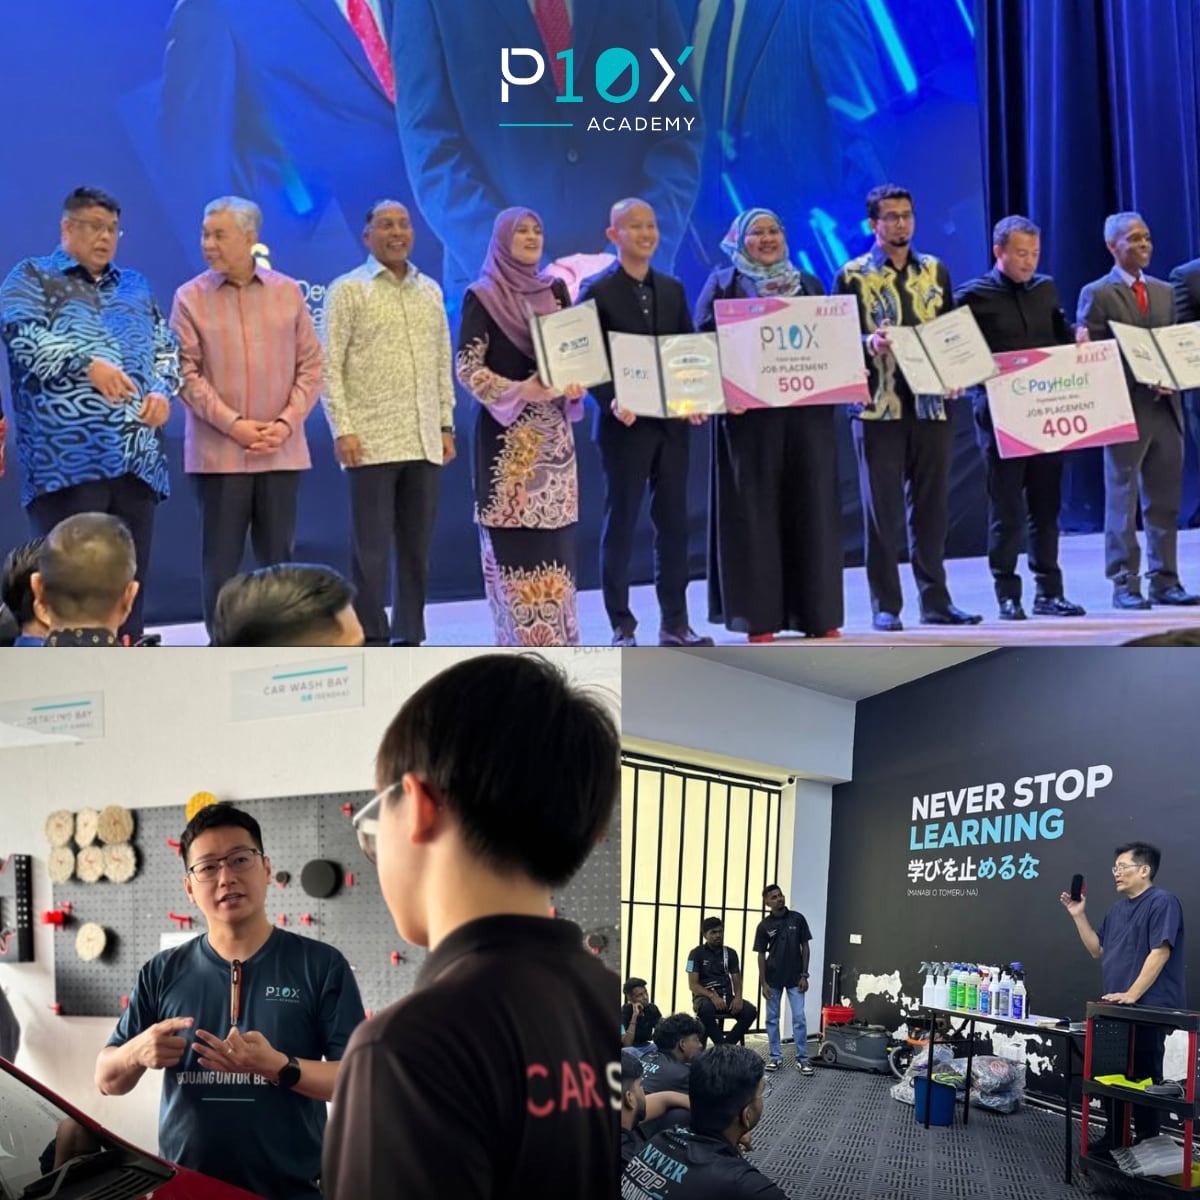
P10X Academy represents Malaysia's first dedicated TVET institution focused on automotive aesthetics and detailing education. The academy gained significant recognition when it was officially launched on 17 June 2025 at Zenith Hotel Putrajaya, with the ceremony officiated by YB Steven Sim, Minister of Human Resources Malaysia. This high-level government endorsement, along with patronage from Yang Mulia Sharifah Nurul Afzan Jamalullail and chairmanship by Datuk Shariffah Maznee Al Attas, demonstrates strong institutional support for the academy's mission.
What sets P10X Academy apart is the direct connection between training and industry practice. Many of the top installers working at 3M Pro Shops managed by P10X in Malaysia are academy-trained professionals who learned the exact techniques described in this article. This creates a direct pathway from education to employment or entrepreneurship.
The installation process detailed in this article requires knowledge that goes beyond watching videos online. Professional training covers proper surface preparation chemistry, film handling techniques, environmental control requirements, troubleshooting common issues before they become visible defects, customer service, warranty documentation procedures, and business operations for those planning to open shops.
If you are serious about professional window tint installation as a career or business venture, exploring automotive aesthetics training programs at P10X Academy provides the credibility and capability that separate professional installers from amateur alternatives.
Frequently Asked Questions
Can I drive immediately after window tint installation?
Yes, you can drive immediately. However, avoid operating your windows for 24 to 48 hours if possible, and do not wash your car for at least 72 hours. The film is secure enough for driving, but the adhesive needs time to fully cure.
Why do I see small bubbles after installation?
Small water bubbles are normal and expected. These are pockets of slip solution that will evaporate through the film over 1 to 2 weeks. Do not attempt to press them out. Contact your installer only if bubbles remain after two weeks or if you see large air bubbles.
How long until my window tint looks perfect?
Full curing takes 2 to 4 weeks depending on weather conditions. During this time, slight haziness and small water bubbles are normal. The film will achieve its final appearance and full adhesion after this curing period.
What happens if it rains before 72 hours?
Rain on the exterior is fine. The 72-hour rule applies to washing and water pressure on the film surface. If your car gets rained on, simply let it dry naturally without wiping the windows.
Should I tip the installer?
Tipping is not expected in Malaysia but is appreciated for exceptional service. If your installer took extra care, explained the process thoroughly and delivered excellent results, a tip is a kind gesture.

Fabian
He is passionate about revolutionizing the car protection services industry by bringing innovation and transparency to a traditionally opaque and often misunderstood field. His mission is to educate end users on the true benefits and importance of car protection, aiming to replace outdated practices with honest, customer-focused solutions. With a fresh approach to car tinting, paint protection film (PPF), and detailing services, he is committed to delivering a superior customer experience that sets a new standard in the market. He welcomes discussions about the future of the automotive industry and is eager to connect with like-minded professionals who share his vision for innovation, integrity, and excellence.
Experience the future of window tinting
Visit a 3M Pro Shop and discover the revolutionary Crystalline CR BLK film