
How to Remove Car Tint in Malaysia Without Wrecking Your Defogger Lines

- Do the four side windows yourself if you want. Hand the rear windscreen to someone who will tell you exactly what they plan to use on it.
- Heat and a slow shallow pull. Never a blade on the rear screen, never ammonia, never peel cold.
- Ask three questions before you agree. What goes on the rear screen. Will a blade touch it. What happens if a line breaks.
- Run the defogger and watch every band before you drive away. That is the last moment a problem is still small.
- When you re-tint, the darkest film is not the coolest one.
Removing car tint in Malaysia is easy on four of your windows. The fifth one can cost you a windscreen.
Your rear screen is the only glass on the car with an electrical circuit printed onto it, and the film sits glued straight over the top of it. Ask anyone who has stripped one. On Lowyat, an owner put the odds at fifty fifty. Another said one wrong move and the heating element comes off with the film. A third said that the day you tint a rear window, you have already agreed to break the defogger one day.
You are probably not doing this for fun. It is an ownership transfer, a Puspakom inspection, or film that has gone purple and started lifting at the edges. Whichever one it is, the job runs the same way, and so does the one pane you have to slow right down for.
Why the Rear Windscreen Is the Risky Pane
Because it is the only glass on your car carrying an electrical circuit. The defogger is a silver ceramic paste, screen printed onto the inside face and baked on in the furnace. Your film is glued over the top of it. Break a line and there is nothing underneath to repair back to.
That is why it looks painted rather than fitted. It is fused to the surface, it stands slightly proud of it, and it is thin enough that abrasion takes it off. A razor blade meets the line before it meets the glue.
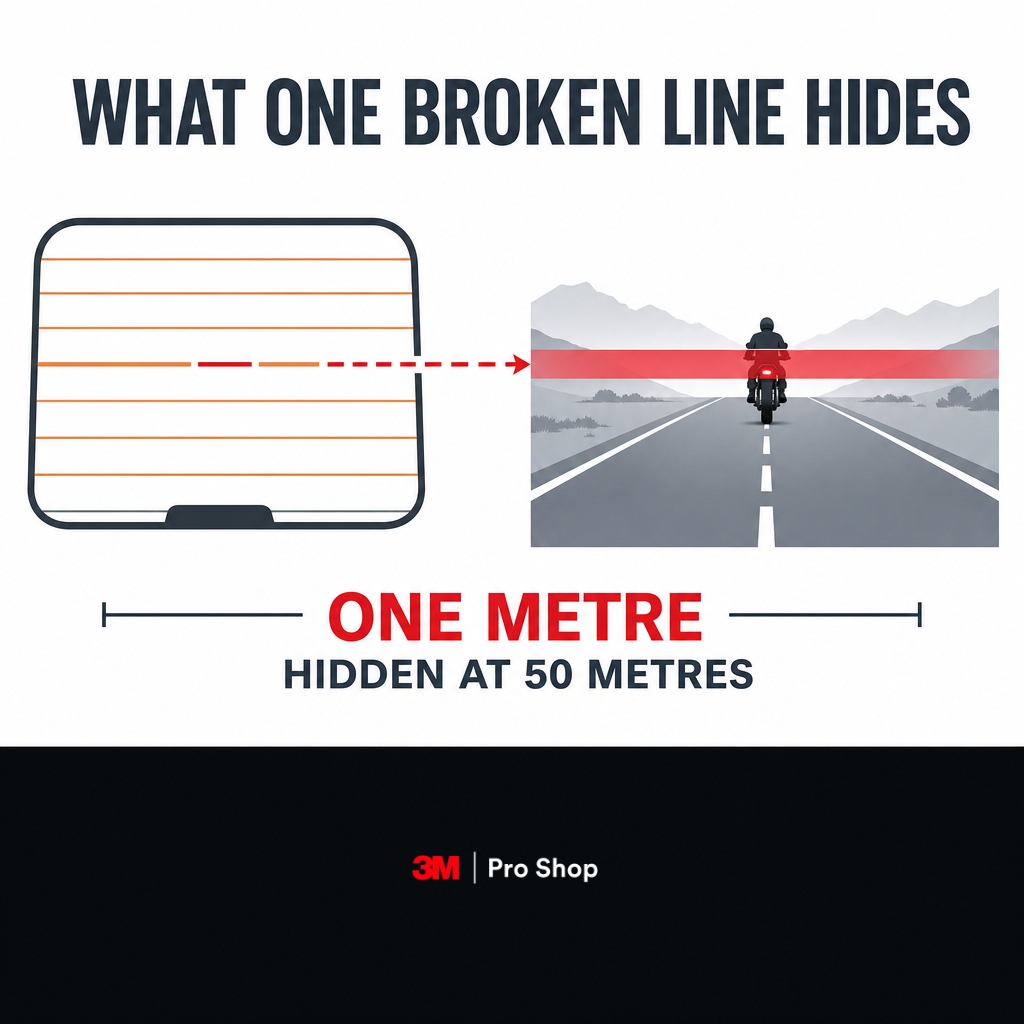
The lines run as parallel strips and each one heats its own band. Break a line anywhere along its length and that entire band stops clearing, across the full width of the glass. Not a spot. A stripe.
Here is what one dead stripe costs you. Take a rear windscreen 600 mm tall with a twelve-line grid, typical for a C-segment sedan. Each line owns a band of 600 divided by 12, so 50 mm. Now measure the optical path from your eye to that glass through the interior mirror. Call it 600 mm from your eye to the mirror and 1,800 mm from the mirror to the rear screen, so 2.4 metres in total. A 50 mm band at 2.4 metres blocks an angle of 0.05 divided by 2.4, which is 0.021 radians. Project that to a vehicle 50 metres behind you and it covers just over one metre of the scene.

One metre at fifty metres is a motorcyclist's fairing and torso. It is the width of a number plate and most of a bonnet. The repair kits sold online restore the circuit, not the view.
How to Tell If Your Old Film Will Tear
Look at the film from outside the car. Even, tight and clear means the polyester and the adhesive are still bonded to each other, so it will lift away in sheets. Purple, hazy, bubbled or lifting at the edges means those two layers have already separated, and it will tear into flakes.
Window film is a polyester sheet carrying the tint and the heat rejection, over a pressure-sensitive adhesive holding it to the glass. Those two layers age at different rates in our heat, and the gap between them is what decides your day.
Good film on for a few years comes off in sheets. Warm the pane, lift a corner, and the whole thing peels away with most of the glue still on the back of it. Ten minutes a window and no drama.
Cheap film that has cooked in a carpark for six or seven years comes off in flakes. The polyester has gone brittle and the adhesive has stayed on the glass, so you are left with a full pane of dried glue. That is the version where the rear screen turns dangerous, because clearing glue means minutes spent working directly over the grid. Film that has turned purple or is bubbling and lifting at the edges has already told you which one you have.
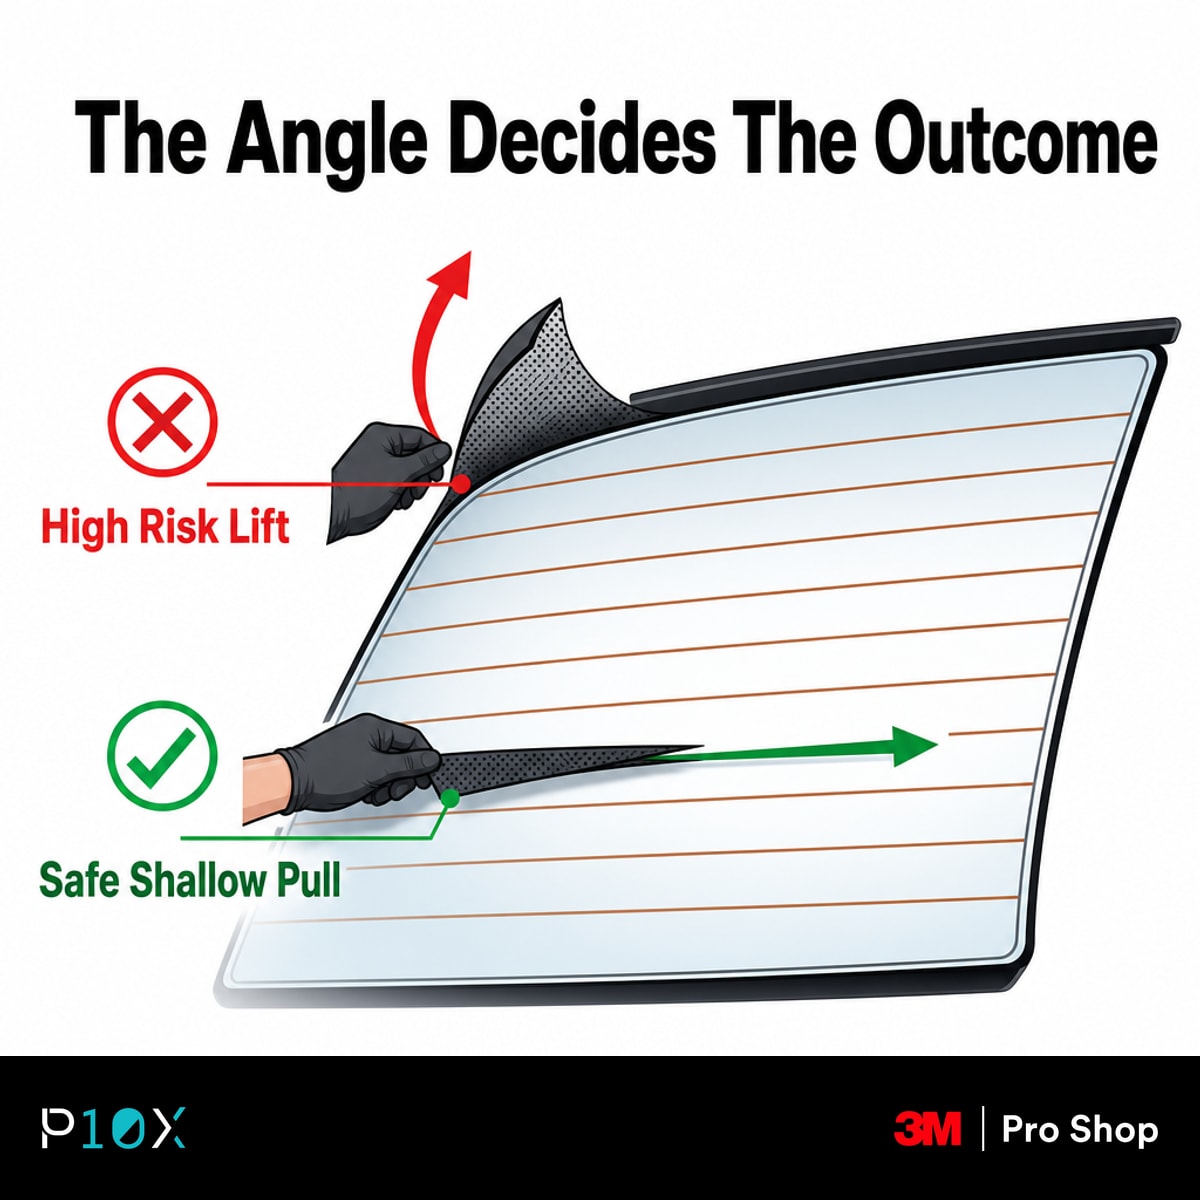
Look at where the adhesive sits in that diagram. It does not stop at the defogger line, it flows over it and around it. On the rear screen, every millimetre of glue you pull is pulling against a printed circuit.
How to Take Car Tint Off, Step by Step
Six steps in this order. Check the glass, do the side windows first, warm the pane, pull slow and shallow, lift the residue with dwell time, then run the defogger before the car leaves. The order matters more than the tools.
Check the Glass and Cover the Switches
Existing chips, edge damage and worn trim all get worse under heat, so find them before you add any. Switches and speakers in the door card need covering before any liquid appears near them.
Start With the Side Windows
No grid, no antenna, nothing printed on them. They are also where you find out whether your film lifts in sheets or tears into flakes, before you touch the pane that matters.
Warm the Pane, Do Not Cook It
Even, sustained warmth from a steamer or a heat gun kept moving softens the adhesive so it releases rather than tears. Concentrated heat in one spot does the opposite. It hardens the film and stresses the glass.
Pull Slow, Shallow and Steady
A slow continuous pull at a shallow angle brings the adhesive away with the film. A fast pull snaps the polyester and leaves the glue behind for you to scrape.
Lift the Residue With Dwell Time
Warm soapy water and a plastic card, worked patiently, lifts glue without touching the grid. On the rear screen the tool never crosses a line at right angles.
Run the Defogger Before You Leave
Look at the glass in low light and watch every band clear evenly. This is the check people skip, and it is the last moment a problem is still cheap to solve.

Watch the angle of the pull in that shot. Film lifted almost parallel to the glass puts the load along the pane. Film yanked upward puts the load into whatever the adhesive is gripping, and on the rear screen that is the grid.
5 Mistakes That Break Defogger Lines During Removal
Ammonia, a blade on the rear screen, peeling cold glass, rushing the final strip, and blaming the film for damage the window seal caused. Four of the five are avoidable in the first thirty seconds of the job, before anyone has touched the car.
Never Use Ammonia on the Rear Screen
It attacks the adhesive, which is why every foreign guide recommends it, and it attacks the ceramic paste holding the grid to the glass, which is why they should not. It also fumes badly in a closed cabin in 34 degree heat.
Never Put a Blade Near the Grid
A razor is fine on a side window. On the rear screen the lines stand proud of the glass, so the blade meets the line before it meets the glue. One pass at the wrong angle severs it.
Never Peel Cold Glass
Cold adhesive does not release, it tears. Every flake left behind is another minute of scraping over a circuit, and every extra minute is another chance to break a line.
Never Rush the Last Strip
Most damage happens at the end, near the top edge where the film is hardest to grip. That is where a slow job turns into a fast one and the tool angle changes without anyone deciding to change it.
Never Blame the Film Too Early
Some film scratches itself against the window seal rather than failing on the glass, which looks like removal damage but is not. The rubber sweep problem explains how to tell them apart before anyone gets blamed.
Four of those five are decisions someone makes before the first corner is lifted. The fifth is a diagnosis. Settle all five at the counter and the job is already most of the way to going well.
That clip covers the checks before a fitting, and every one of them applies in reverse on removal day. Glass condition, trim condition and water near switches are the same three risks running the other way.
DIY Tint Removal or Paying a Malaysian Shop
Do the four side windows yourself and hand over the rear windscreen. On the grid-free panes the worst realistic outcome is a slow afternoon. On the rear screen the worst outcome is a new pane of glass, the labour to fit it, and a car that will not demist through the monsoon until you do.
That middle path is the one most owners never consider. Strip the side windows at home, then bring the car in with only the rear screen left. A shop will quote that happily, the job is short, and you have taken your own hands off the only pane where they can do real damage.
Timing helps too. Glass that has been sitting in the sun all afternoon is already halfway warm, which is why removal goes faster at two in the afternoon than at eight in the morning. A car pulled straight out of a basement carpark needs more heat and more patience for the same result, and impatience is what breaks grids.
If you are handing over the whole car, ask the three questions from the top of this page before you agree. A shop that answers all three plainly has done it before. A shop that will not commit is telling you something too, and the same logic runs through our guide to choosing an authorized dealer and the pre-install handover checklist.
Taking door panels off for a fitting is the same instinct at the other end of the job. Work that takes longer to set up almost always takes less to put right.
What Tint Shade to Re-Fit on Each Window
JPJ requires at least 70 percent visible light transmission on the front windscreen and 50 percent on the front side windows, with no darkness limit on the rear. The shade that rejects the most heat is CR BLK 50, not the darkest film on the shelf.
That last point is where owners go wrong. They come off a Puspakom peel, notice the rear has no limit, and fit the darkest film available. Across the Crystalline Black range, total solar energy rejection peaks in the middle of the shade range and falls away at both ends. CR BLK 50 rejects 68 percent. CR BLK 15, which is dramatically darker, rejects 64 percent.
So going darker on the rear buys privacy, costs heat rejection, and makes the mirror view worse on the exact pane you just risked a grid to clear.
There is one more reason to keep the rear sensible. That is the pane you look through every time you reverse out of a bay, change lane on the Federal Highway, or check what is filtering up behind you at a light. You spent the morning protecting that grid. It would be a strange decision to then make the view through it worse than it needs to be.
| Glass | JPJ minimum VLT | Suggested 3M shade | TSER | Why |
|---|---|---|---|---|
| Front windscreen | 70 percent | CR BLK 70 | 65 percent | The legal ceiling and the strongest performer that meets it |
| Front side windows | 50 percent | CR BLK 50 | 68 percent | Highest heat rejection in the range and legal on this pane |
| Rear side windows | No limit | CR BLK 35 | 67 percent | Privacy for rear passengers with almost no heat penalty |
| Rear windscreen | No limit | CR BLK 35 | 67 percent | Keeps the mirror view usable on the pane you just cleared |
| Glass roof or sunroof | No limit | Ceramic IR | Up to 63 percent | Largest single pane and the one directly overhead |
Every figure there comes from the current Crystalline Black range, which replaced the original Crystalline here at the end of 2025. The CR BLK launch article covers what changed and the JPJ compliance guide covers the legal side properly.
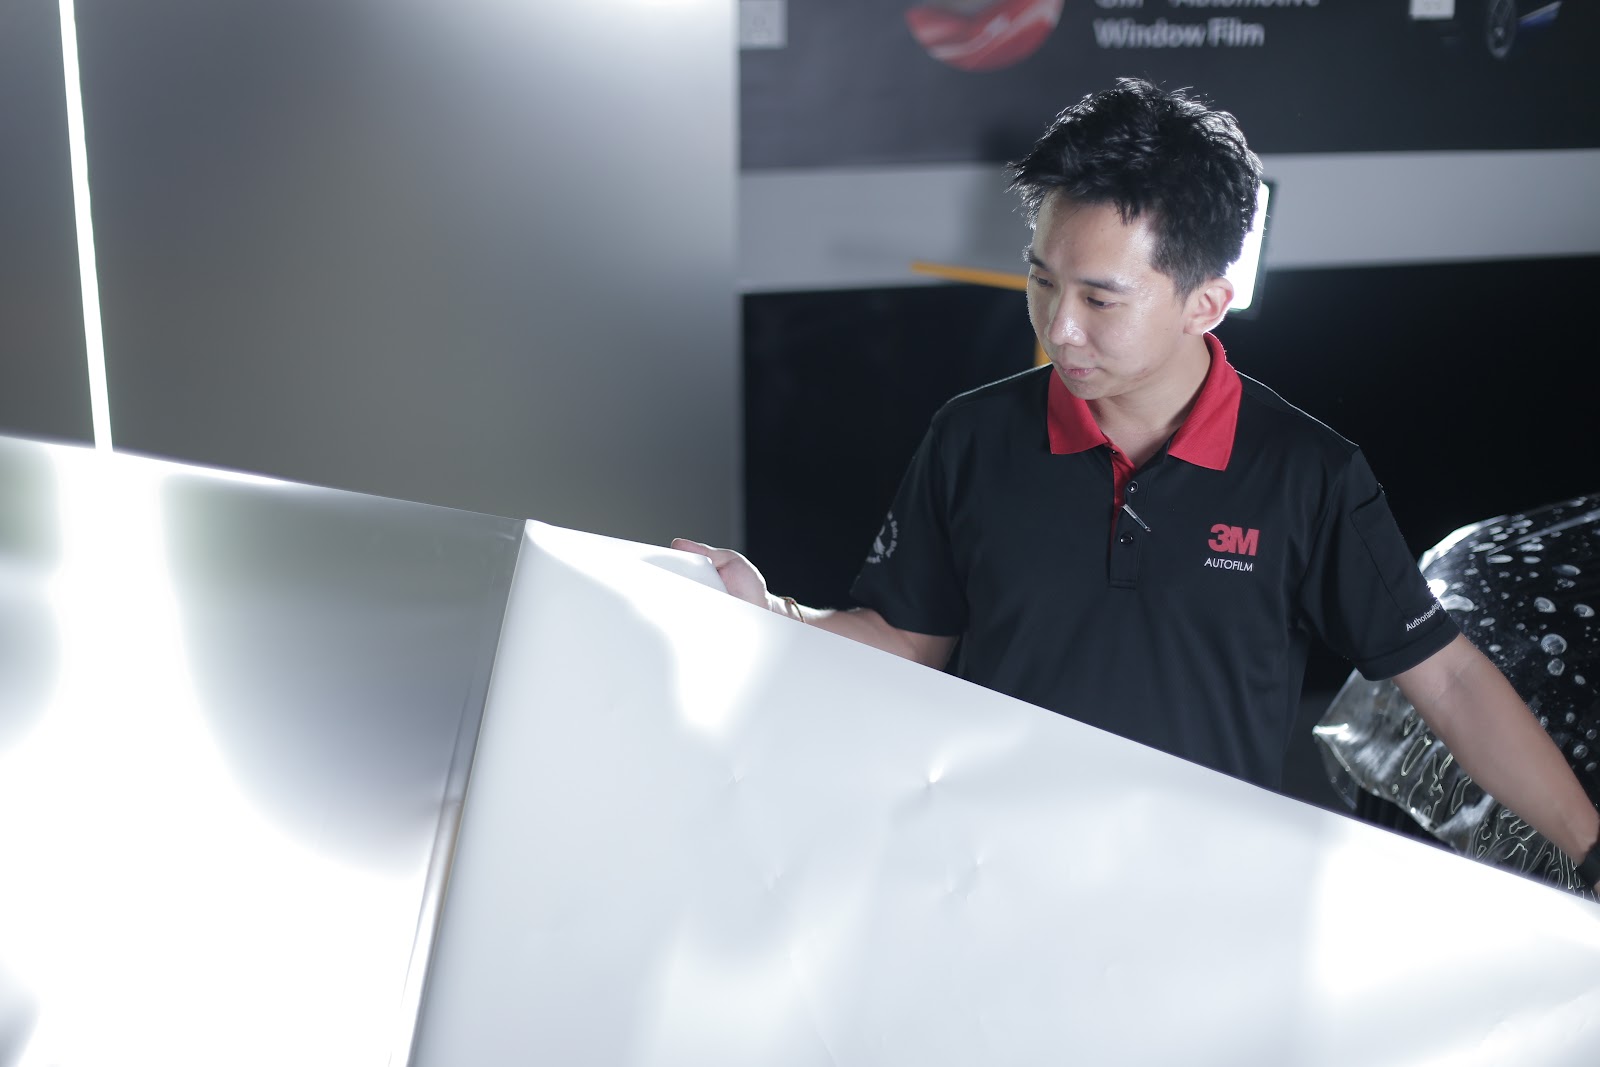
One practical note on sequence. New film only goes on once the glass is genuinely clean and dry, so a same-day strip and re-tint is fine on the side windows and worth slowing down on the rear. Any adhesive haze left behind gives the new film something other than glass to bond to, and that is where early bubbling starts.
Your Tint Removal Checklist Before the Car Leaves
Inspect the glass and cover the switches. Do the four grid-free panes first and learn how your film behaves. Bring warmth, not force. Pull shallow and slow. Lift the residue with dwell time and a plastic card, never a blade and never ammonia on the rear screen. Then run the defogger and watch every band before the car leaves the bay.
One thing worth knowing before you book. A 3M window film warranty registered by an authorized dealer such as 3M Pro Shop by P10X is tied to the car, not to the shop, and the covered defects on 3M film are bubbling and cracking. Yellowing is not covered on any 3M film, whatever anyone tells you at the counter. What is true is that the film is built with UV inhibitors designed to resist yellowing in our sun, which is a good reason to pick quality film and a poor reason to expect a replacement.
Nothing on this list is difficult. It is all slow. The rear screen punishes speed and forgives patience, and that is the entire skill.
Car Tint Removal Questions Malaysian Owners Ask
Does removing car tint damage the rear defogger?
It can, and that is the only real risk in the job. The defogger is a silver ceramic paste printed onto the inside of the glass, so it comes off by abrasion. Heat and a slow shallow pull leave it intact. Blades, ammonia and fast pulls do not.
Can I remove car tint myself?
On the front and rear side windows, yes, with a steamer or heat gun, a plastic card and patience. On the rear windscreen the downside is a new pane of glass, so most owners do the side windows themselves and hand over only the rear.
What is the easiest way to remove old window tint?
Warm the pane evenly, lift one corner, and pull slowly at a shallow angle so the adhesive comes away with the film. Then clear whatever glue is left with warm soapy water and a plastic card rather than a blade.
Why does old tint come off in small pieces?
Because the polyester layer and the adhesive have separated with age and heat. The polyester has gone brittle and the glue has stayed on the glass. It is a sign of a failed film rather than a failed technique, and it means more residue work.
Does ammonia damage car windows or defroster lines?
On a rear windscreen, yes. Ammonia softens adhesive, which is why it appears in so many guides, but it also attacks the ceramic paste holding the defogger grid to the glass, and it fumes in a closed cabin.
What happens if a defogger line breaks?
That whole horizontal band stops clearing, across the full width of the glass. On a typical 600 mm tall screen with a twelve-line grid, that is a 50 mm band, which hides roughly one metre of the scene at 50 metres. Conductive repair paint restores the circuit but leaves a visible mark.
How long does it take to remove tint from a car?
A full car is usually a half day, with most of that time spent on the rear screen and on residue rather than on the film itself. A shop that quotes an hour for a full car is not planning to be careful on the pane that needs care.
Can you put new tint on right after removing old tint?
Only once the glass is genuinely clean and dry. Any adhesive haze left behind shows through the new film and gives it something other than glass to bond to, which is where early bubbling starts.
Find out the best protection for your car
Visit a 3M Pro Shop and discover the cost-effective 3M Protective Film and Window Tint
Author

Kelvin Cheen
Kelvin is an Automotive Solutions Consultant and Branch Manager at 3M Pro Shop. With 4+ years of field experience in premium vehicle surface protection, Kelvin specializes in flagship 3M technologies, including 3M Crystalline Black optical film and Ceramic IR tints, 3M Paint Protection Film (PPF), etc. His focus is on delivering transparent, engineering-backed advice to car and EV owners, cutting through sales upsells to ensure customers choose the exact thermal rejection and paint protection tailored to their driving needs.
Experience the future of window tinting
Visit a 3M Pro Shop and discover the revolutionary Crystalline CR BLK film